The online course market is set to reach $457 billion by 2026. With figures like this, it’s no surprise that so many people are becoming course creators.
If you’re thinking of jumping on the bandwagon, then you need to know how to create your course the right way.
The first step toward creating a successful online course is to choose a platform to host your course. This can either be your own website using a platform like Learndash, or one of these reputable online course platforms. Once that’s done, you can focus on creating a course outline, which is the foundation that gives your course structure.
Unfortunately, a lot of creators skip this step, which is one of the top reasons why so many of them fail dismally.
If you want to build a course that will stand out from all the rest, this is a crucial step that you cannot afford to ignore.
Read the rest of this article as I explain how to create an online course outline in 10 simple steps.
1) Basic Course Information
This section of your outline should contain the following:
- Course Name: Include your course name in your outline.
- Course Description: Describe your course and what the end goal is that people get when they go through your course.
- Course Requirements: Make sure learners understand exactly what is required to complete your course, including software, technology, work experience, or prerequisite knowledge, etc.
These are basic details that should be included with every course outline. They will help you to promote and sell your course, which can be quite profitable.
A well-written course description that is captivating and complete will help you attract a more targeted and engaged audience. In your course description, you will state exactly what your course is about and how it will help learners, which means you only attract people who are looking for that exact solution or result.
Furthermore, this information will help ensure that your students are as prepared as possible before taking a course which makes it more likely that they will achieve the desired learning outcomes upon completion.
2) Course Schedule
Next, you must include a schedule outlining your timeframe for creating each step of the course. Everyone is living a busy life, and including a schedule section within your course outline will help your learners to better manage the time they have to learn your content. So make sure you clearly define the following when writing your course outline:
- Course start and end dates
- Dates of each life session
- Due dates for completion of learning activities
- Dates for course assessments
…and so on.
When students know what to expect from your courses, and when, it makes it a lot easier for them to plan their busy lives around their lessons to ensure that there is ample time to complete the required material.
3) Learning Outcomes

Another essential component of learning how to create an online course outline is to list your learning outcomes. When you have defined outcomes for your lessons, it gives you and your learners a clear understanding of how learners are assimilating your knowledge.
With clearly outlined learning objectives, you’ll know and students understand and retain your knowledge.
Furthermore, learning outcomes help you set expectations for what your students should know, understand, or be able to do once they successfully complete your course. When crafting your learning outcomes, use action verbs for describing expectations within the learning outcomes listed.
For example, “Learners will be able to set up an automated email series for their marketing campaign.) Use verbs like “use“, “identify“, “analyze“, “interpret“, etc. in your learning outcomes.
4) Define Each Lesson Plan
Now, it’s time to start outlining your course content in blocks. Order it in a way that will make sense to your students. Remember, you need to help them get from point A to point B, but your content must flow in a way that maintains engagement throughout the course.
Begin your content breakdown with definitions for each lesson plan. Break down the main topic into smaller subsections and then organize them from least to the most complex. Once the subtopics are ordered, you can break those down into more easily digestible lessons.
For instance, if I have a course about the fastest ways to learn to speak, say, French, I can break the topic down to “Learn French Alphabet and Pronunciation,” “Understand Basic Vocabulary Building,” “Master Grammar Essentials,” “Apply Practical Communication” and so on.
One of the best ways to plan the subtopics in your course is to use this hierarchy:
- Modules: A course module can contain chapters and lessons, or lessons alone.
- Chapters: Chapters can only contain lessons.
- Lessons: These are the individual learning blocks of which your online course is composed. You organize them using chapters and modules.
Pro Tip: Name your lessons with catchy titles. This way, your learners will be unable to resist clicking them inside your course.
5) Create an Assessment Plan
An assessment plan is built in alignment with learning objectives. So, while learner objectives state what they will learn, your assessment plan states how you as the instructor will gather evidence for how students achieved their objectives.
You need an assessment plan that details the type of assessments that will take place within your course structure, including how they will be marked and how they will provide evidence of learning and retention. Your assessment plan can consist of multiple assessments, including:
- Online examinations
- Essays
- Group projects
- Multiple-choice exams
- Quizzes, etc.
You can use different types of assessments to find evidence for multiple learning outcomes. Choose appropriate assessments that will help you evaluate learning quality and allow you to understand the degree to which your students mastered the knowledge that you taught them.
Depending on how extensive each of your learning blocks is, you can place assessments in the last lesson of each module in your course.
6) Schedule of Activities
Once the plan is made, you can create this portion of the outline.
Armed with an understanding of how you want to assess your students, you can then create activities to help facilitate learning and help students achieve their objectives.
Make sure your course activities work in parallel with your assessment plan. If learners need to provide evidence of comprehension by completing a test, then you must ensure that the activities in the schedule should prepare them for the assessment.
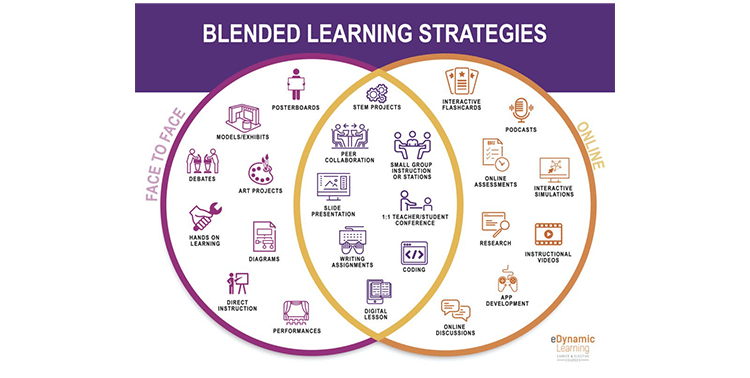
Activities can include lectures, readings, discussions (small group or whole group), or any other activities that help learners meet their objectives.
7) List Learning Resources (Essential and Complementary)
For each of the lessons in your course, you must list, attach, or link to learning resources that your students will require to complete the lesson successfully. You can also include optional learning resources that they might find useful, even after the course ends.
To make your course more engaging, very the formats for your resources to include a wide range of materials, such as:
- Books
- Articles
- Videos
- Podcasts, etc.
These types of resources will help your learners not only to master the essential knowledge that you want them to learn but also to retain complementary knowledge from other resources related to your online course.
Diversifying your learning resources will also help you cater to different learning styles. It’s essential to do this as some students learn better by reading written content while others learn better by watching videos or listening to audio recordings.
8) Instructional Methods

You have a lot of online teaching methods that you can choose from. But, there are a few options that are more effective than others.
You can add these to your online course outline, including:
- Videos of yourself talking to the camera paired with a screen recording of your presentation slides.
- Screen recordings of your presentation slides synced with a high-quality audio recording.
- Recordings showing how to achieve something with either software or a step-by-step demonstration.
…and so on.
9) Contact
Each of your learners wants to feel connected and supported, which is why you need to focus on promoting a sense of community between you and your online students.
Depending on the online course platform you’re using, you’ll be able to create spaces for your students where they can interact with each other, with you, and with your content.
They will also be able to discuss topics, ask questions, and make lesson comments. These spaces make it easy for you to address concerns, collect reviews, and share new content and notifications in a timely way.
You can even use an online forum or group to create a mastermind for your students. This is one area where you can get as creative as you want in order to provide even more value to your learners and ensure that they operate at peak performance.
10) Add Bonuses
Finally, your online course outline should include an overview of your bonuses (if any). I would recommend that you add at least some bonuses. Everyone loves a few unexpected extras. You can surprise and delight your course students with exclusive access to bonus materials that will complement the course content.
By including these bonuses in your outline, you make your course even more appealing to prospective learners. The best part is that your bonuses don’t have to be elaborate or time-consuming to create. You can add simple, digital downloads, such as:
- Checklists
- Workbooks
- eBooks
- Results trackers
- Templates
- Scripts
- Case studies
- Bonus lessons
And with that, you’re done with your course outline!
Do You Really Need an Online Course Outline?
The simple answer is, yes. You absolutely do need an online course outline. Not only will an outline help you create your online course faster and better, but it will also provide you with a roadmap to follow so you can complete the content creation process quicker and more effectively.
You’ll be able to clarify whether you can repurpose assets that you already have or if you need to create new course materials from scratch. Here are some additional reasons why you should learn how to create an online course outline:
A course outline will help you:
- Create your course navigation menu
- Ensure that your content flows from one idea to the next
- Keep students engaged as you take them from point A to point B
- Prevent you from, including unnecessary information in your course
- Make it easier to plan, schedule, and develop learning activities for learners
- Create appropriate assessments to assist in learner retention
- Help students understand your course’s value, benefits, and final outcomes
As you can see, the benefits of a well-structured course outline are many.
Keep in mind that your course outline doesn’t have to be the final outline you use. You can modify it. According to student feedback. But, it does give you a clear overall picture of exactly what your course will teach, as well as its outcomes.
The good news is that you don’t have to create the entire outline from scratch. There are plenty of online course outline templates available to choose from, some free, and others paid.
That’s about it for this guide on how to create an online course outline. I hope it comes in handy when you start building your online courses. Good luck!
