Movavi Video Editor has been around since 2004. It’s a popular video editor used by over 3 million happy users from 200 countries across the world. I’ve used it myself in the past and am a big fan of the software.
And considering that a Cisco actual report estimates that 82% of all internet traffic will be video by 2022, it’s worth finding a good video editor so you can capitalize on this trend.
In this article, I will provide you with a full Movavi Video Editor review. I’ll give my thoughts on the software – what I like about it and what I don’t like so you can make a better-informed decision as to whether or not this is the right video editing tool for you.
Movavi Video Editor Summary

Ron’s Thoughts
Movavi Video Editor is a great piece of video editing software for all intents and purposes. Advanced functions and premium features come standard if you choose the Movavi Video Editor Plus plan. It also supports rendering videos in 4K and has some impressive features for YouTubers and Vloggers. It’s also equipped with an integrated video capture system that lets you directly record from an iPhone, camera, or Android device to the software.
-
Biggest Pro:
Plenty of Advanced Features and Functions
-
Biggest Con:
Lack of Support for the H.265 Video Codec
-
Annual Discount:
No
-
Price:
Starts at $44.95/Year
-
Promotion:
Is the Movavi Video Editor Worth it?
Over the years, Movavi has gained a reputation as being an excellent video editing program that’s suitable for everyone – even complete beginners with no prior editing experience.
In my opinion, this Movavi video editor is definitely worth the cost.
It has a provable ROI, and it can pay for itself in a relatively short amount of time.
Take a look at what some of its key features will allow you to do:
- Create your engaging movies and slideshows
- Apply effects and filters so your videos can stand out
- Include animated transitions and titles in your videos
- Add recordings of your voice-over via microphone
- Share videos online or export them in any of the popular formats
All the features of this software make it the perfect tool for complementing remote work, distance education, fun projects, etc.
The Movavi Video Editor can take care of everything, from video creation and editing to converting a screen recording. With it, you can make your professional-looking movies or videos in no time.
Who is the Movavi Video Editor Good For?
Whether you’re an amateur or an expert video editor, Movavi has a lot.
This video editing tool is great for anyone who wants to maximize the use of video mediums to communicate with their audience.
It’s for anyone who wants to effectively use tools that can help them create more engaging, informative, and professional videos.
In terms of the robust yet straightforward interface, features, stability, performance, and support, Movavi is very hard to beat.
Here are some use cases for this video editor to help you understand how this software can support different types of creators.
Movavi Video Editor Use Cases
YouTube Channel: If you want to create gaming videos, tutorial videos, etc., for a YouTube channel, this software can help you do so. It contains everything you need to record and edit YouTube videos to stand out.
Video Ads: Video ads don’t have to use up your budget. With a tool like Movavi video editor, you can create unique and great-performing video ads in the most convenient, effective, and affordable way.
Product Demo Videos: The video editor helps you create great product demo videos. On the site, you will even find a step-by-step guide for developing compelling explainer videos using the software. This is particularly useful for first-time users who want high-quality video production.
Travel Blogger: If you want to share engaging travel clips or incredible vacation memories as a travel blogger, Movavi can help you do that. Your videos will look professional even if you’ve never edited a video on a PC before.
Everyday Use: This tool can also be the perfect tool for anyone who wants to edit and share footage of wedding videos, memorable birthdays, home movies, etc. In short, it can be used by ANYONE to create and edit any kind of video.
You can use Movavi’s editing software to:
- Remove mistakes and cut scenes you don’t want others to see
- Create video ads for your small business or employer
- Polish and preserve home movies for generations to come
- Edit funny videos of friends, family, pets, etc.
- Create professional-looking videos of weddings, birthdays, etc.
- Easily upload finished videos to social media sites
Movavi Video Editor Pros and Cons
Movavi is a great platform. But, as with all other online tools and software, it comes with its unique mix of benefits and drawbacks.
In this part of the Movavi Video Editor review, we take a look at the pros and cons so you can make a more informed decision about whether or not this tool is the right fit for you.
Pros:
- Intuitive: Movavi makes it extremely easy for beginners with no prior video editing experience.
- Windows 7 and Above: The software supports Microsoft Windows 7 and above. You can also use the software on Apple’s Mac OS.
- Premium Features: Movavi has tons of premium features such as timeline markers, animation options, editing video track, etc.
- Built-In Training: Movavi software also has a built-in training module to shorten the learning curve.
- 4K Rendering: This feature allows for even faster processing of 4K videos.
- Advanced Editing Functions: Movavi video editor offers chroma key, PiP, titling, motion tracking (like for slow motion of the video tracks), keyframing, subtitles, and even slow motion.
- Intro Mode: I like this feature a lot. The software allows you to preset sequences, transitions, and graphics at the start of your videos for consistency. This is an excellent feature if you’re a Vlogger or Youtuber.
- Integrated Video Capture: This allows you to record to the software directly from a connected camera, iPhone, Android device, or webcam and even do a screen capture.
Cons:
- Slow Rendering: The software tends to get slightly slow when rendering heavy video files.
- Limited Support: Movavi doesn’t support H.265.
- Lack of Control: The video editor has limited control over some of the effects (e.g., title addition and editing).
Movavi Video Editor Functionality
In this section of the Movavi Video Editor review, we will look at the functionality of this video editor.
If you want to follow along, you can install Movavi by clicking the blue download for free” button on this page.
The file will then be downloaded automatically, and you can proceed with the installation process.
To install Movavi Video Editor, simply double-click on the downloaded file, and installation will begin automatically.
It takes under a minute to install, and the interface can be accessed in 14 international languages.
1. User Interface
When you open the video editor for the first time, you will see this dashboard:
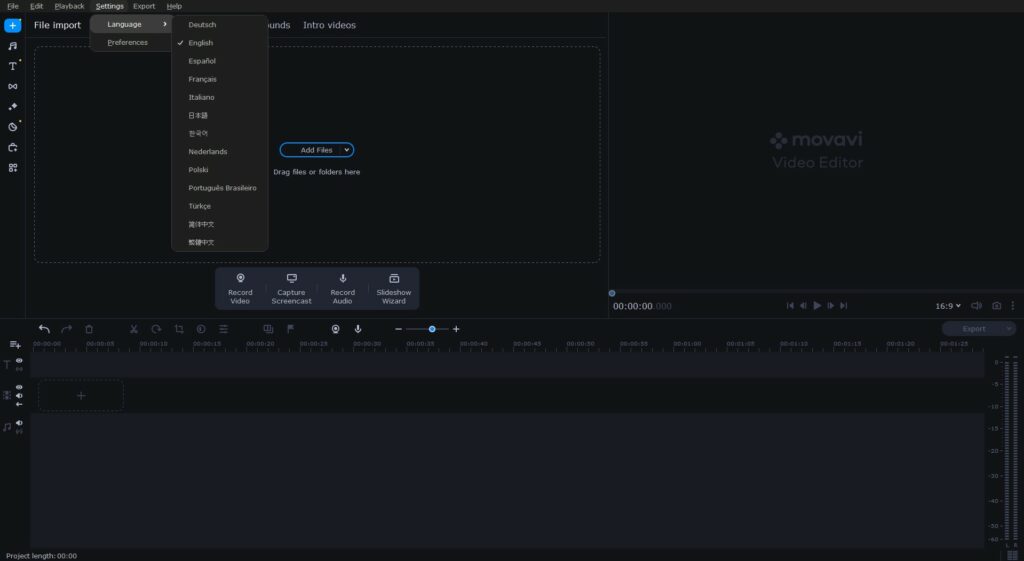
As you can see, the user interface is simple and easy to use.
It has a standard layout similar to most other video editors, where you can import files and move them to a timeline. You may notice that the timeline here is identical to Final Cut Pro, and I think that’s a very purposeful design choice.
You also have a video preview of the final results in the top right of the page, as in the image below:
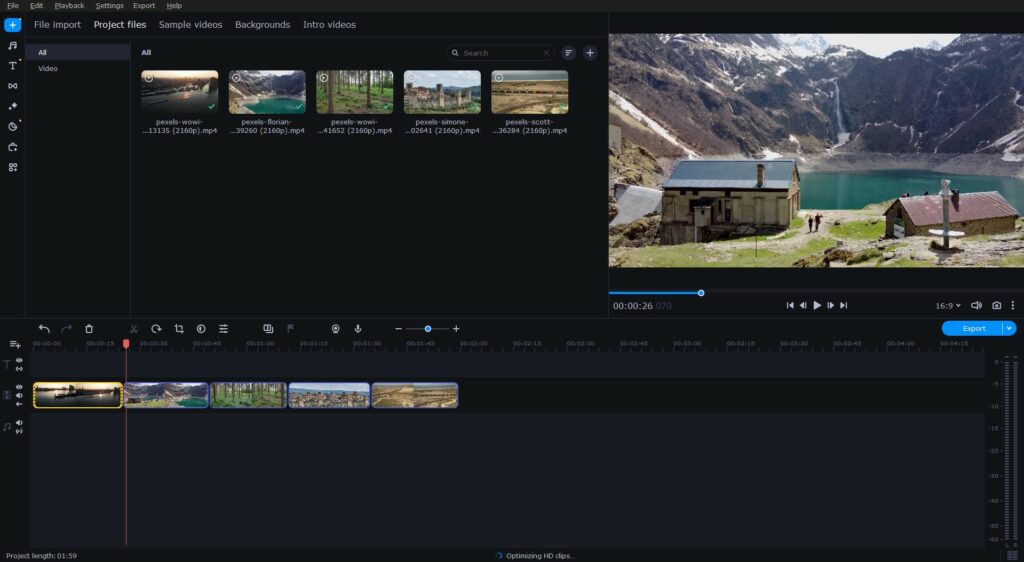
You can easily import any previously recorded video to get started editing it with the software.
You can also import images, audio, and various other file types that you need for your new video.
Furthermore, there are tons of sounds, music, backgrounds, and useful sample videos that you can choose from within the software.

The dashboard is designed to make it easy to find anything you’re looking for, including the filters, an equalizer, audio effects, graphics, effects, and everything else this video editing software offers.
But Movavi’s user interface has some special surprises for users as well.
For instance, they have the Montage Wizard.
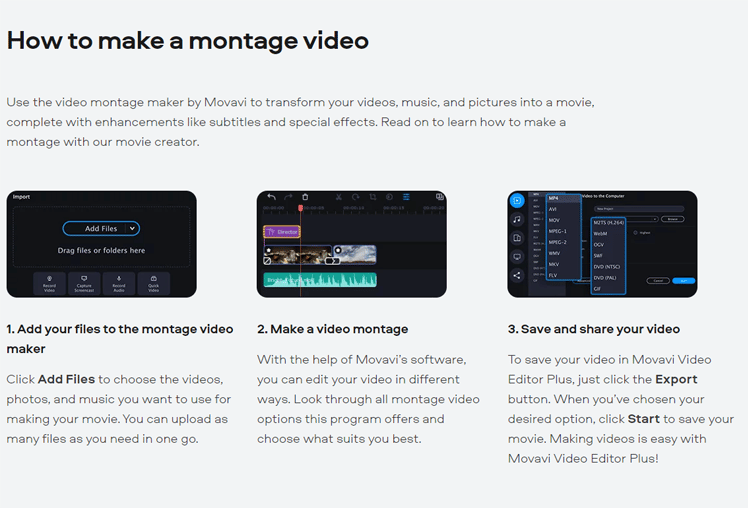
This function allows you to make a quick video that’s a series of images. This is great if you’re looking to create a slideshow but don’t want to spend a ton of time editing everything. They have a complete walkthrough of how to use this function here.
2. Editing Capabilities
Movavi has all kinds of excellent editing tools for editing videos.
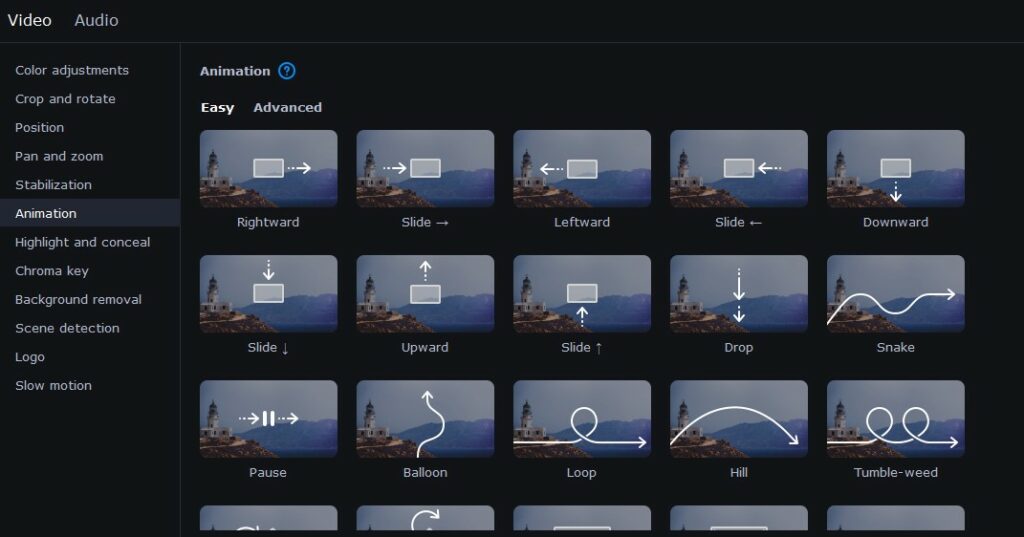
Some of the main editing capabilities of this software include transactions, titles, and stickers.
Transitions
The platform makes it as easy as you can edit your videos.
For instance, you can do transitions where you can join two clips using a neat animation, such as zoom features and more:
- Blur in
- Page Turn Effect
- CrossFade
- Zoom in
- Fade in
- Warps
…and much more.
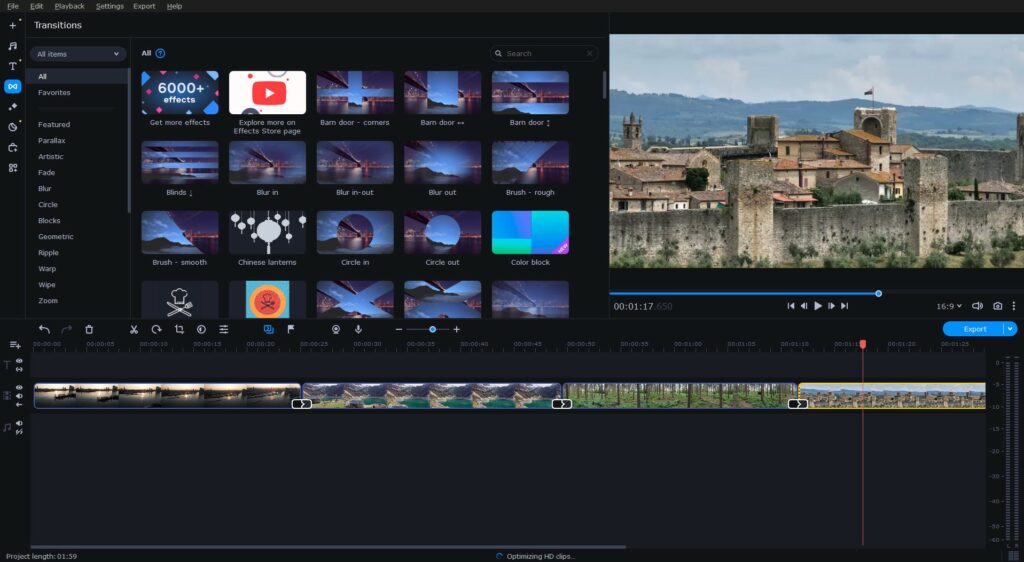
To add a transition, you right-click on your chosen one, and you will be presented with the option to include it either before or after your clip.
This is just one of the many bells and whistles on this platform to help make your editing efforts as easy as possible while giving you professional-looking results.
Titles
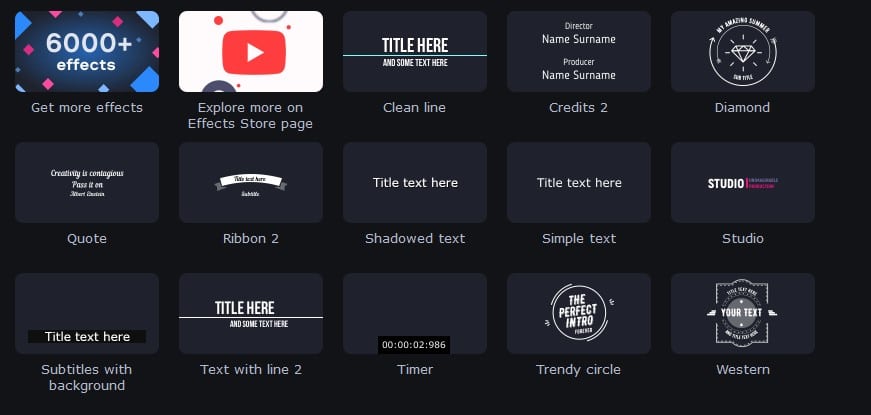
Titles are just text that you can add to your videos.
You can choose to add ordinary text, or you can add titles in different fonts and fancy text, as shown in the image below:
Stickers
There are tons of clipart-style graphics you can include in your videos.
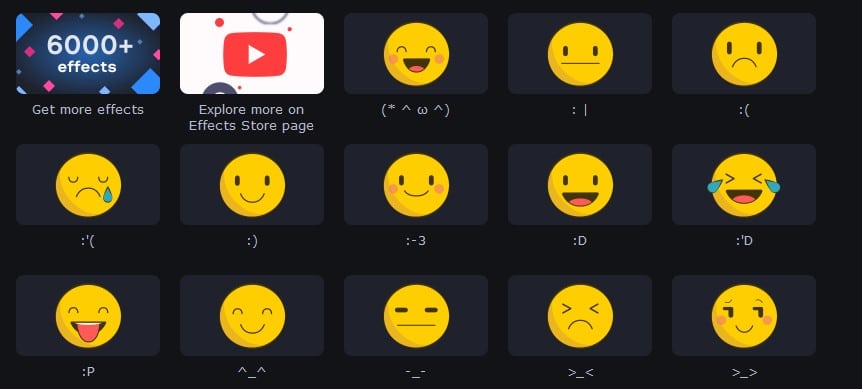
To add them, simply right-click any sticker and select “Add to Current Position.”
You will then be able to move and resize the sticker and choose how long it should appear in this position.
3. Video Effects
Movavi’s software also offers good sample videos and video effects.
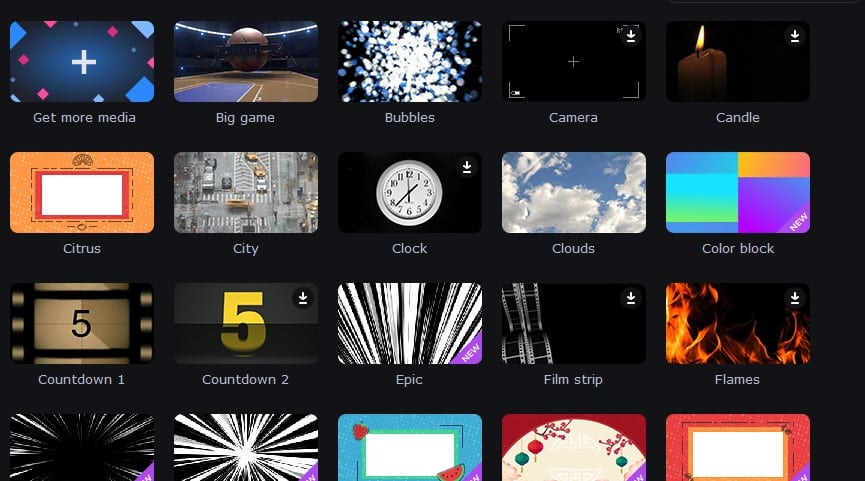
Each of these is fairly small (just a few seconds in length), and they are quick and easy to download.
This makes it more convenient to create videos without searching Google to find the video and audio effects you need.
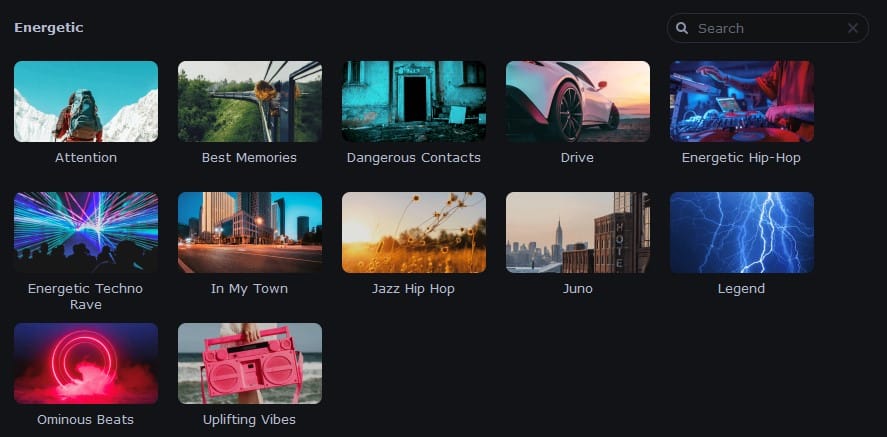
Furthermore, all this is included for free download without charge, which means you don’t have to rely on external or paid services if you want to add some nice effects to your video.
4. Project Workflow
So far, it’s clear that you can create an outstanding video in under 30 minutes with this tool.
There is no need to spend tons of time studying complicated software.
All you need to do is follow these few short steps:
Step #1: Add Media Files to the Program
Step #2: Split Your Video into Parts and Delete the Unwanted Segments
Step #3: Apply Artistic Effects to Your Videos and Photos
Step #4: Join the Video/Image Fragments with Smooth Transitions
Step #5: Add Video Titles (to the beginning and end, as well as overlay titles)

Step #6: Add a Soundtrack to Your Movie or Slideshow
Step #7: Save the Finished Video and Uploaded to the Web
This article from Movavi goes into more detail on each of these steps so you can be up and running in the quickest way possible.
5. Ease of Use
The Movavi video editor has a spotless interface that makes it easy to see and manage all the properties you want to apply to each of your video clips.
For instance, you need just a few clicks if you want to apply a filter. All you have to do is right-click it and choose “Add to Selected Clip” (or you can add it to all clips, depending on what you’re trying to do).
To remove a clip or edit its properties, such as speed, volume, applied effects, etc., simply click the star icon located at the top left of the clip.
It’s that easy!
The software is designed to do ALL the hard work for you.
There are a few minor annoyances beginners might have with this software.
For instance, when adding titles, it’s not immediately clear that you can resize the text window as the mouse cursor does not change when you move over the text borders.
Also, there is no way to enter the exact font size you need. Instead, you can only choose the font from the drop-down with the list of options – and this can be quite limiting for some users.
But, once you’ve played around with the software for a couple of minutes and understand how it works, it all flows nicely, and these issues won’t seem like such big problems after all.
6. Video Output
When using Movavi, by default, the videos you create and edit will be exported using the same settings for the video projects.
The output video will be displayed exactly the way you saw it in the preview area.
You can change the resolution and aspect ratio (among other settings) by clicking the pencil icon.
You’ll then be able to view and edit your project settings.
The tool offers a broad range of output options that cover all the frequently used formats for videos and audio. The most common and sufficient codec of MP4 is available, but it also offers other popular formats like MOV, AVI, and WebM.
As a beginner, it’s probably best to leave the output settings alone unless you know exactly what you’re doing.
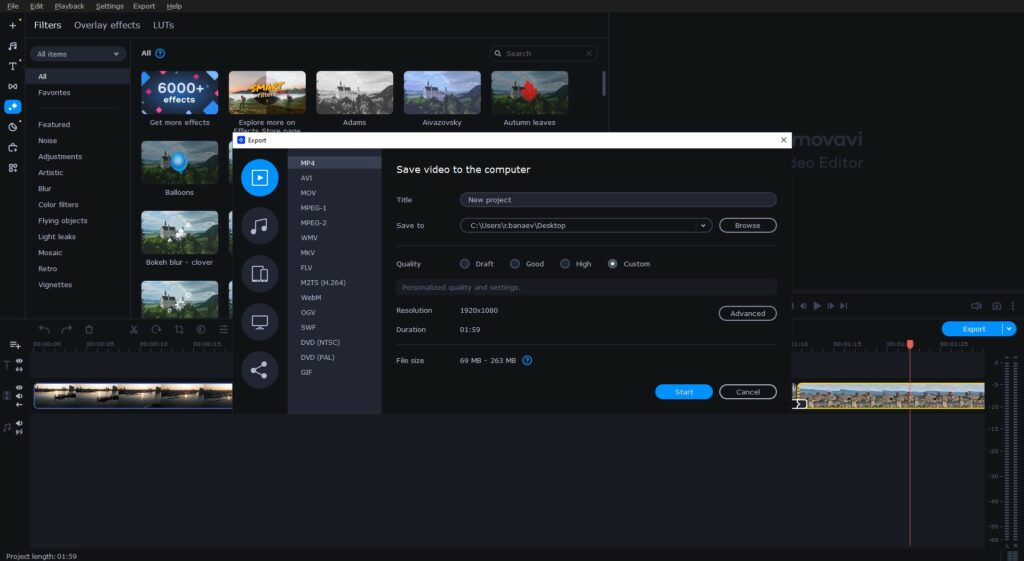
The sharing and output feature in Movavi can be pretty helpful, particularly for active people on video streaming platforms.
You can upload your videos directly from Google Drive, Vimeo, or YouTube by signing in.
Movavi Video Editor vs. Competitors
Movavi vs. Filmora
Of all the video editing software available today, Filmora is probably the closest competitor for the Movavi video editor.
It has a similar layout and many of the same features, including inbuilt effects, audio, text, graphics, etc.
However, for $69.95, it costs significantly more than Movavi Video Editor ($39.95).
Filmora also has a steeper learning curve, which means that beginners might find it more challenging to use.
Movavi vs. Camtasia
The main difference between these two video editors is that Camtasia focuses on video effects, transitions, and animations, whereas Movavi focuses on filters, products, fades, and 3-D video editing.
Other than that, both of these video editors are among the best options on the market today, and each is a great option to choose.
However, Movavi is cheaper, and it allows you to share videos directly from YouTube, Facebook, or Vimeo.
Movavi vs. iMovie
One of the significant differences between Movavi and iMovie is that the latter only runs on Mac, while Movavi can run on both Mac and Windows.
Also, Movavi users can export files in various formats without issues, whereas iMovie formats are restricted.
The bottom line is that Movavi is simple to use, multifunctional, and contains tons of special effects. So compared to iMovie, it’s easily the better option.
Pricing
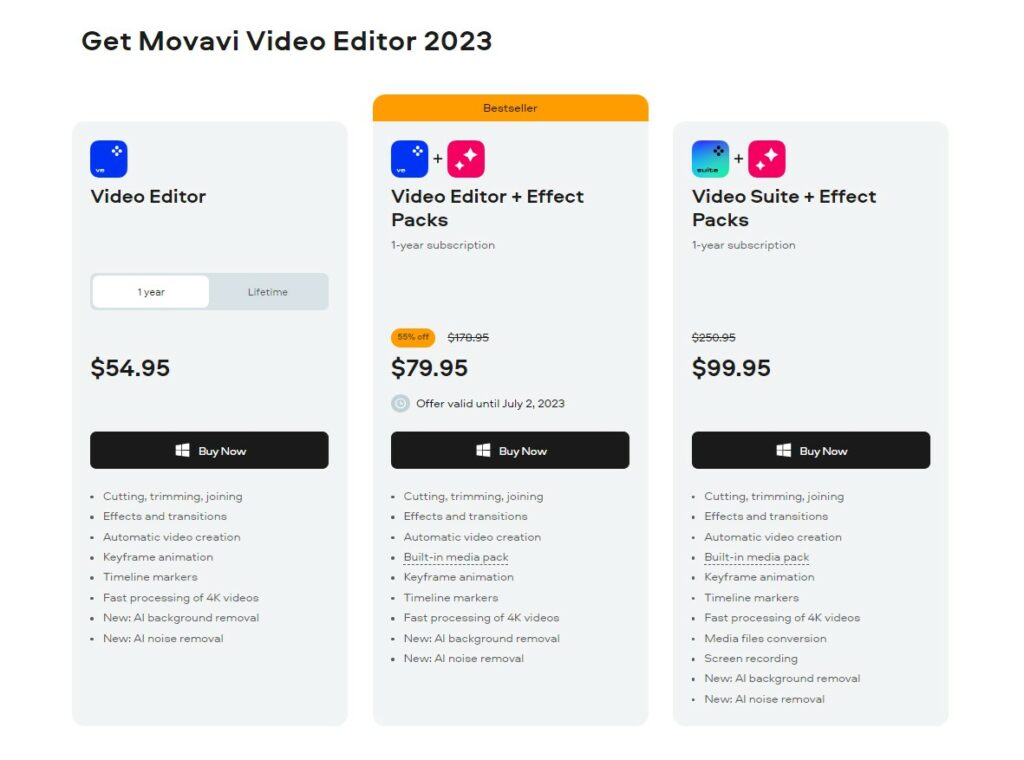
Here is the pricing structure for Movavi Video Editor Plus:
Movavi Video Editor (1-Year License): $44.95
- Includes all features of the video editor plan for an entire year.
- You will have to renew once a year has expired
Movavi Video Editor + Effect Packs (Lifetime License): $79.95
Allows for all functionality of the software forever.
- Cutting, trimming, and joining (advanced trim modes)
- Effects and transitions (in storyboard style layout)
- Keyframe animation
- Automatic video creation
- Timeline markers
- Built-in media pack
- Superfast processing of 4K videos
Video Suite + Effect Packs (Lifetime License): $99.95
In 2021, Movavi launched the latest version of Movavi Video Suite, an even more powerful version of this software to allow for more effective creation, editing, and sharing of video content.
The software has the best contents Movavi Video Editor which has a Video Suite package that offers more than a few compelling features, the Movavi Video Editor Plus. Still, the full version also includes media files conversion and screen recording. When you record video, import video, create quick videos for social media, and more.
You can use editing tools as well, such as their video converter. If interested, you can read all about that in my Movavi video converter review.
You can download a free trial and try all of Movavi’s features for free.
Product Support
Movavi has a robust product support center that includes an in-depth knowledge base.
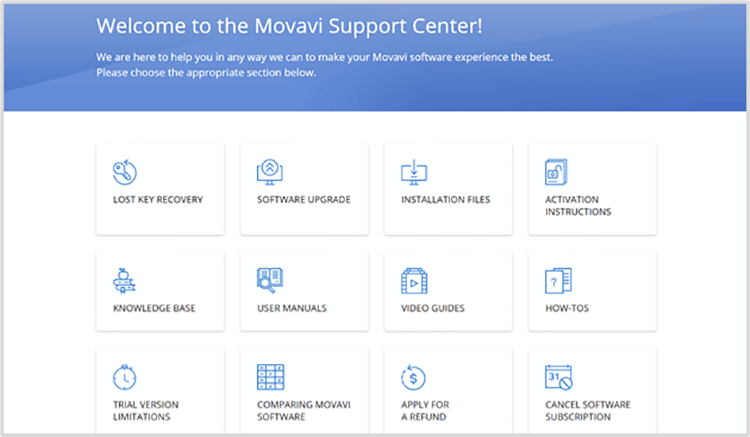
The software also comes with a wide range of video tutorials, how-tos, and user manuals to cover every aspect of the video creation and editing process.
The videos will help you get to know the program and how to perform specific tasks when editing your videos.
For instance, if you need to learn how to insert text overlays, you must search through the videos to find what you need.
The video tutorials are updated every week, and they offer a great way to help save time and cut down on the learning curve.
Movavi contact support via email or live chat on the website.
FAQ
Generally, Movavi video editing software adds a watermark to the output files when using the trial version of video editing programs.
To remove the Movavi watermark, you must purchase the software and activate the product using Genuine Key.
Once you have the license, you will be able to save videos without the watermark. There is no need to look for any special way to remove the watermark. All your files will be cleared of watermark as soon as you activate your software license.
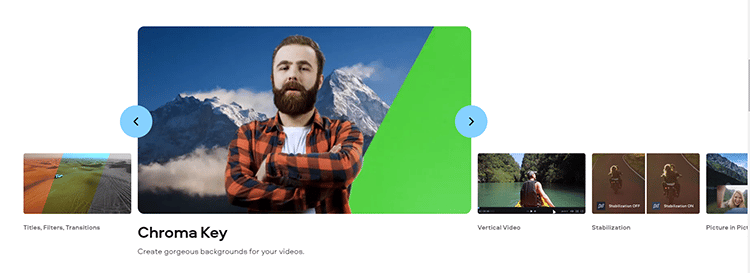
Movavi allows you to use a green screen to take each of your video project from good to great.
You can swap the green screen with any digital backdrop or template you choose, from serene beaches to the vast expanse of space when you record screen, and even use the chroma key for editing a long and short video.
Movavi also has scene detection, and Movavi allows importing media files to the program and then editing your footage using a green screen video effect afterward.
To insert text to a video or image in Movavi, simply launch the program and add your video or image.
You can then open the text panel, click the “Add Text” button, and type the characters inside the box that appears over the video image.
You can add several blocks of text, and you can also choose from many different forms and fancy text options available within the software.
Movavi is safe to use, although there’s a feature that you should pay attention to during installation.
After the installation process is complete, the installer asks whether to run the program and asks for permission to transmit usage statistics.
It may be in your best interest to take the time to review the details before making the decision. There are no requirements for you to participate, and you can simply choose to decline if you wish to.
Unfortunately, most people simply click through to the end without reviewing this part. Other than this potential privacy issue, the program is safe to use.
Is the Movavi Video Editor Legit?
To summarize this Movavi Video Editor review, I’ll say that it’s among the best video editing software for its price than most video editing software.
And, when compared to its competitors and alternatives, such as Filmora, Windows Movie Maker, Videopad, and Adobe Premiere, Adobe Premiere Pro, this software’s editing options and awesome tools make it a great option if you’re looking to save some money and have quality software.
In my opinion, Movavi’s video editor is legit and worth buying than other video editing programs.
It has a simple and easy-to-use interface and has an impressively wide range of built-in effects, audio, graphics, text, etc.
It’s easy for beginners to use, and it’s offered at a very affordable price.
If you’ve been asking yourself ‘Is Movavi good?’ and if you are looking for a video editing app that is affordable, simple to use, and comes with all the tools for creativity, then the Movavi Video Editor is the right tool.
What do you think of the Movavi video editor? Worth the money? Let me know in the comments below.

Thank you for the in depth reviews on video editing software. With your articles, I’ve decided to try Movavi. I will be creating youtube music videos w/ my own soundtracks and this sounds like the right one for me. Thanks again, I felt overwhelmed & your articles helped me tremendously. I’ll definitely use the affiliate link to purchase 🙂
Very glad you found it helpful, Megan!
What rig did you test it with as MovAvi has some pretty specific hardware requirements if you truly want to experience the best in speed. Yes it does not support H.265, but what it does support fully is the nVidia NVENC which are faster IMO. I mainly use MovAvi for video converting and as a standalone converter, there is no faster as it uses CUDA cores instead of relying on the CPU.
If your PC does not meet all of the minimum requirements, then you will experience slower than optimal performance in processing. My previous PC was an AMD based with a nVidia GT8800 GPU and converting a 2hr 2K file took only 23 minutes. My current PC is an Intel core i5-10th generation along side an nVidia GTX1650. That same 2hr 2K video file converts in under 7 minutes. So yeah, your hardware must meet the requirements otherwise you won’t get the speed you’re supposed to get.
Am încercat Movavi Video Editor Plus 2022 ! Da , este adevarat ! Recenzia ta este foarte obiectivă . Mulțumesc mult !
I have been using Movie Edit Pro from Magix Software in Germany but I am going to try Movavi and see how I like it. It look nice but………. we’ll see.
Can these Slideshows be burnt to DVD anymore? Or, do all the projects have to be exported to Facebook, Androids, Flashdrives, etc. How do you display a finished project nowadays?
You should be able to move the files to DVD/Flash Drive, etc. While I’m not sure exactly how, all you are getting are files to work with so if you can always choose a destination for them.
Hi Ron, can you tell me whether Movavi has the functionality to record my face live using my laptop camera while I’m interviewing someone on Zoom (them taking up all the screen, I would hide the self view) and showing my interviewee on my desktop screen? Then I’d like to edit myself onto the screen in a little circle/square, so viewers can see both of us interacting.
Btw I’m glad there’s still video editing software for Windows 8.1!
I think it would be. You should contact their support as I’ve never done this, but I think it would work for this.
I jumped in at version 23 and as a long-time video editor having experience with most consumer video editing suites, Movavi is among the most stable. Another reason for me to use Movavi is that it does very descent chroma-keying.